Bạn muốn tạo một menu con bên dưới menu custom post type. Điều này rất dễ dàng thực hiện chỉ với một đoạn code ngắn.
Tuy nhiên, trước khi bắt đầu. Bạn hãy đảm bảo rằng đã biết tạo custom post type trong WordPress. Nếu bạn vẫn chưa chắc chắn, hãy đọc bài viết này.

Đăng ký custom post type
Trước tiên, để có thể tạo được menu con bên dưới, bạn phải đăng ký custom post type.
Đoạn code dưới đây sẽ hỗ trợ bạn đăng ký một custom post type mới. Hãy thêm đoạn code này vào file functions.php của theme hoặc child theme của bạn.
// Register Custom Post Type
function event_post_type() {

	$labels = array(
		'name'                  => _x( 'Sự kiện', 'Post Type General Name', 'hocwordpress' ),
		'singular_name'         => _x( 'Sự kiện', 'Post Type Singular Name', 'hocwordpress' ),
		'menu_name'             => __( 'Sự kiện', 'hocwordpress' ),
		'name_admin_bar'        => __( 'Sự kiện', 'hocwordpress' ),
		'archives'              => __( 'Item Archives', 'hocwordpress' ),
		'attributes'            => __( 'Item Attributes', 'hocwordpress' ),
		'parent_item_colon'     => __( 'Parent Item:', 'hocwordpress' ),
		'all_items'             => __( 'Tất cả sự kiện', 'hocwordpress' ),
		'add_new_item'          => __( 'Add New Item', 'hocwordpress' ),
		'add_new'               => __( 'Thêm sự kiện', 'hocwordpress' ),
		'new_item'              => __( 'New Item', 'hocwordpress' ),
		'edit_item'             => __( 'Edit Item', 'hocwordpress' ),
		'update_item'           => __( 'Update Item', 'hocwordpress' ),
		'view_item'             => __( 'View Item', 'hocwordpress' ),
		'view_items'            => __( 'View Items', 'hocwordpress' ),
		'search_items'          => __( 'Search Item', 'hocwordpress' ),
		'not_found'             => __( 'Not found', 'hocwordpress' ),
		'not_found_in_trash'    => __( 'Not found in Trash', 'hocwordpress' ),
		'featured_image'        => __( 'Featured Image', 'hocwordpress' ),
		'set_featured_image'    => __( 'Set featured image', 'hocwordpress' ),
		'remove_featured_image' => __( 'Remove featured image', 'hocwordpress' ),
		'use_featured_image'    => __( 'Use as featured image', 'hocwordpress' ),
		'insert_into_item'      => __( 'Insert into item', 'hocwordpress' ),
		'uploaded_to_this_item' => __( 'Uploaded to this item', 'hocwordpress' ),
		'items_list'            => __( 'Items list', 'hocwordpress' ),
		'items_list_navigation' => __( 'Items list navigation', 'hocwordpress' ),
		'filter_items_list'     => __( 'Filter items list', 'hocwordpress' ),
	);
	$args = array(
		'label'                 => __( 'Sự kiện', 'hocwordpress' ),
		'description'           => __( 'Sự kiện', 'hocwordpress' ),
		'labels'                => $labels,
		'supports'              => array( 'title', 'editor', 'thumbnail' ),
		'hierarchical'          => false,
		'public'                => true,
		'show_ui'               => true,
		'show_in_menu'          => true,
		'menu_position'         => 5,
		'menu_icon'             => 'dashicons-beer',
		'show_in_admin_bar'     => true,
		'show_in_nav_menus'     => true,
		'can_export'            => true,
		'has_archive'           => true,
		'exclude_from_search'   => false,
		'publicly_queryable'    => true,
		'capability_type'       => 'page',
	);
	register_post_type( 'event', $args );

}
add_action( 'init', 'event_post_type', 0 );
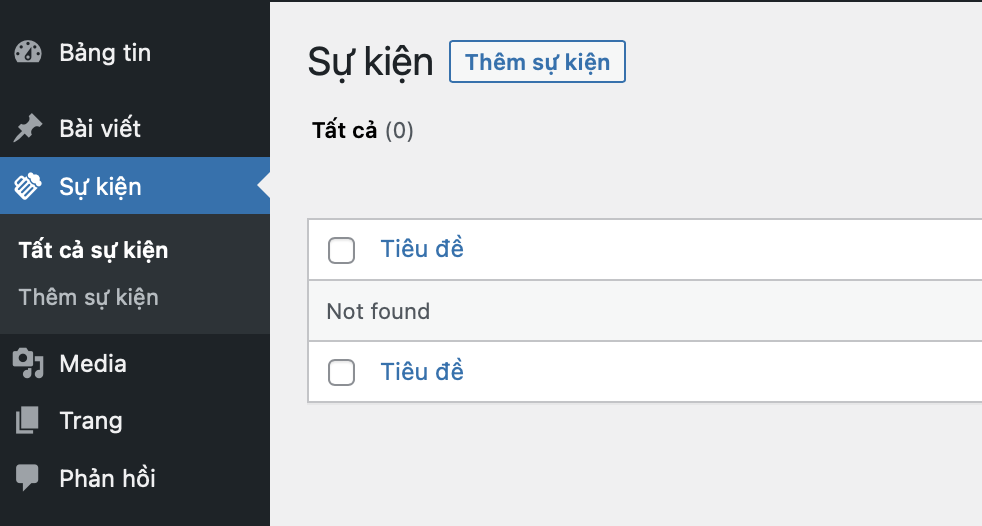
Kết quả bạn sẽ nhận được là một menu mới có tên là “Sự kiện”.

Thêm menu con cho menu custom post type
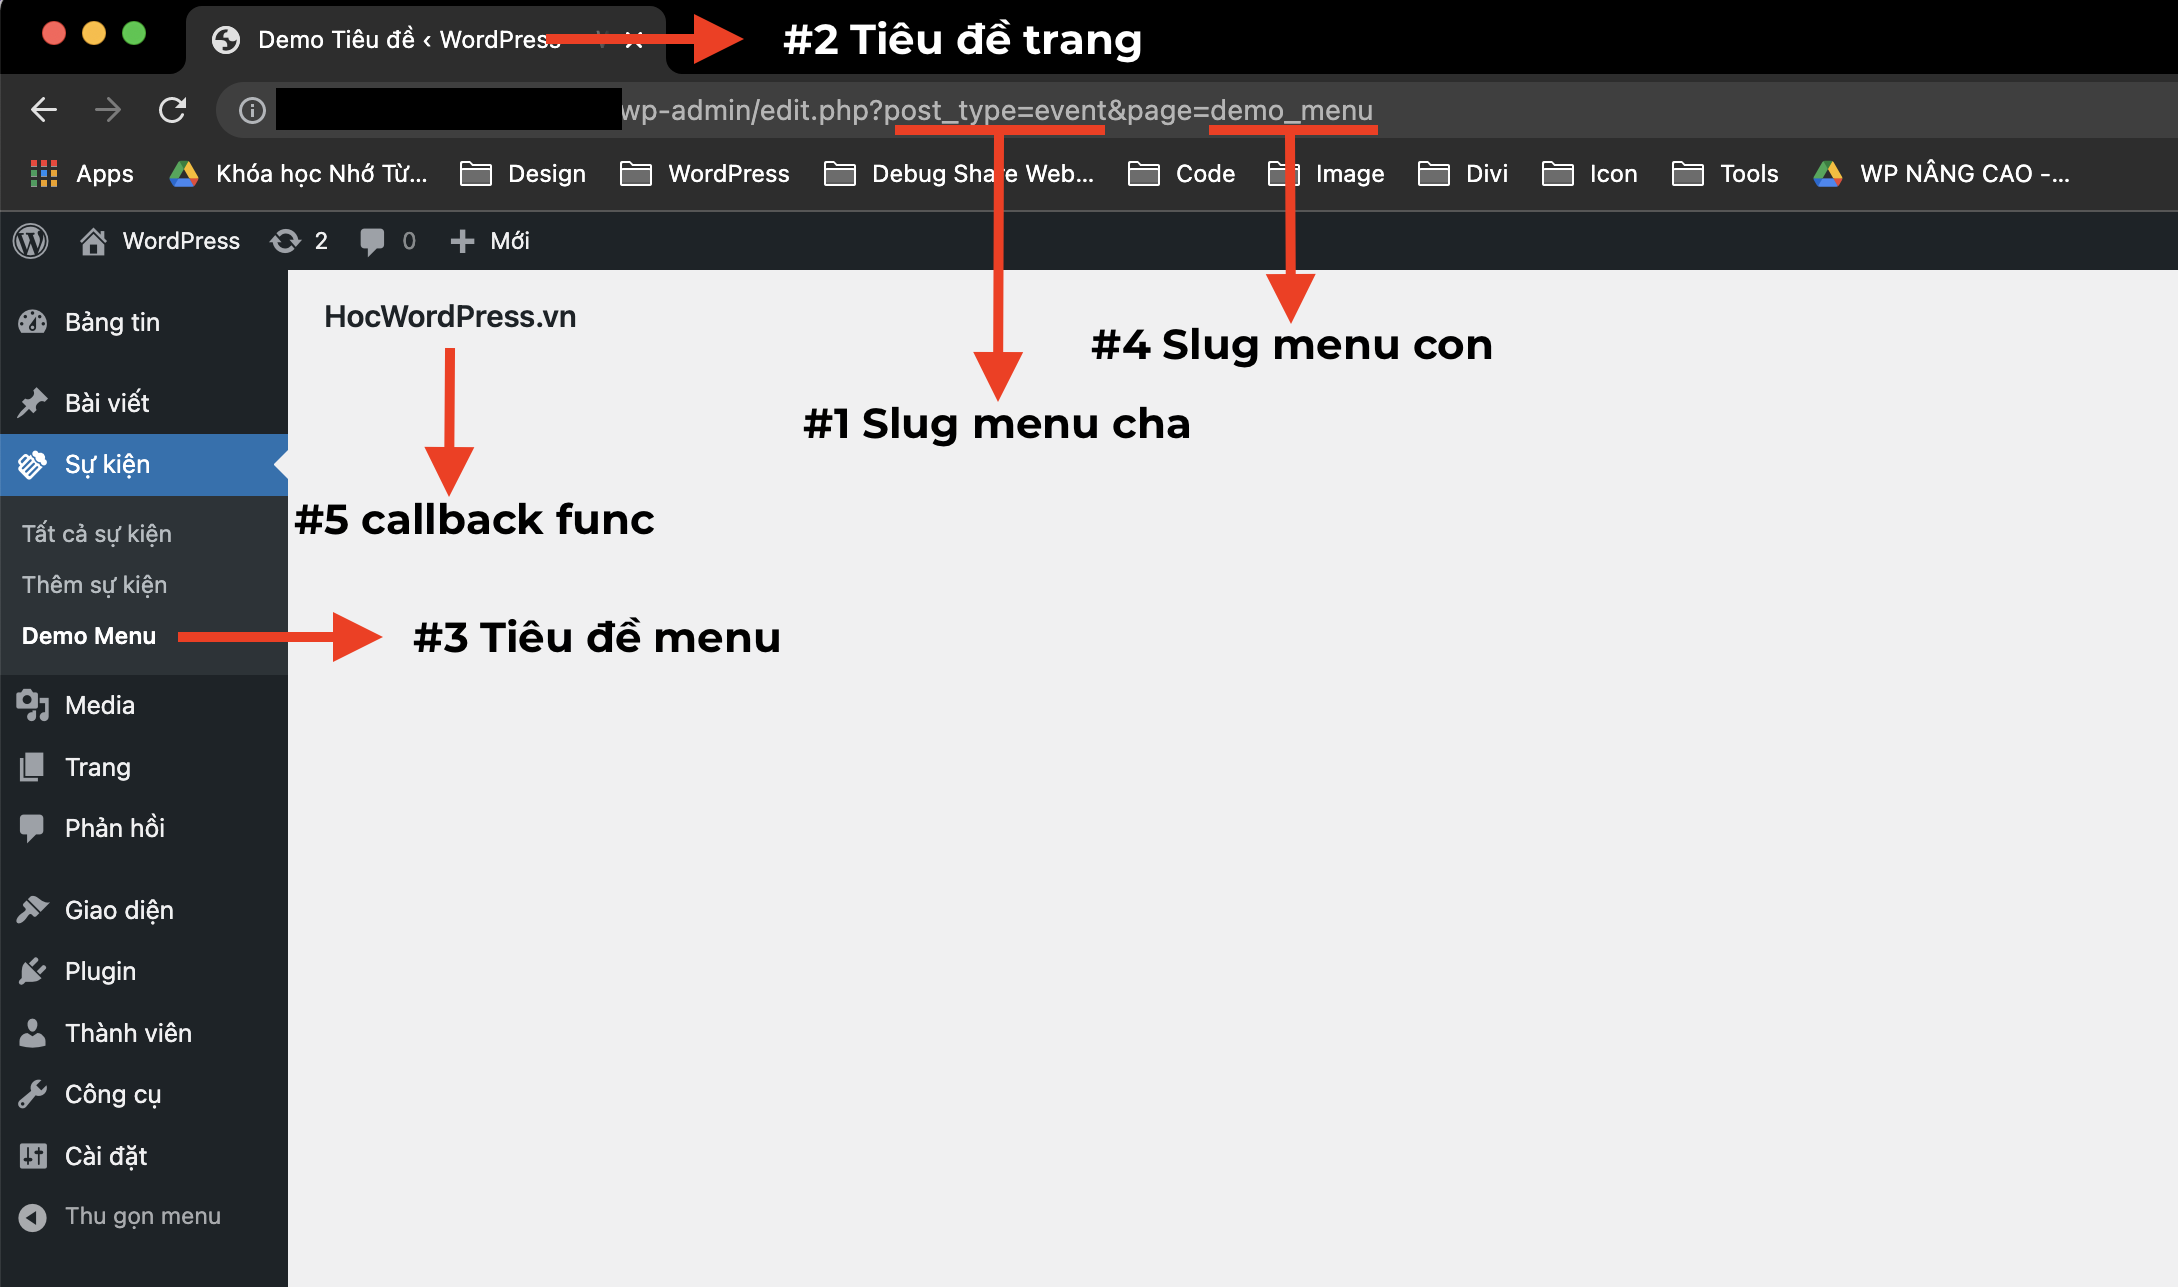
Để tạo một menu con bên dưới menu “Sự kiện”, bạn phải sử dụng hàm add_submenu_page() của WordPress. Hãy thêm đoạn code sau vào file functions.php bên dưới đoạn code đăng ký post type ở trên.
// Hook
add_action('admin_menu', 'hk_demo_submenu_event');

// admin_menu callback function
function hk_demo_submenu_event(){

	add_submenu_page(
		'edit.php?post_type=event', #1 Slug menu cha
		'Demo Tiêu đề', #2 Tiêu đề trang
		'Demo Menu', #3 Tiêu đề menu
		'manage_options',
		'demo_menu', #4 Slug menu con
		'hk_render_page' #5 callback function
	);

}

// add_submenu_page callback function
function hk_render_page() {
	echo '<h2>HocWordPress.vn</h2>';
}
Sau khi thêm đoạn code trên vào file function, kết quả bạn sẽ được như hình bên dưới. Hình bên dưới cũng bao gồm chú thích các phần tử ở trong hàm add_submenu_page().

Lời kết
Mình hy vọng các bạn có thể áp dụng giải pháp này trong quá trình phát triển theme hoặc plugin WordPress của mình. Đặc biệt khi bạn cần tạo một số trang cài đặt cho các custom post type.
Nếu các bạn thấy bài viết này hữu ích, hãy bình luận và chia sẻ bài viết này. Ngoài ra, bạn có thể theo dõi chuyên mục Thủ thuật WordPress và follow Facebook để biết thêm nhiều kiến thức mới nha.


